Showing posts with label Faber-Castell. Show all posts

Saturday, May 24, 2014

Count Your Rainbows

Rc faber castell rainbow

Hello, friends!  I'm up on the Faber-Castell Design Memory Craft Blog today with my final guest designer post!  

I got a little "artsy" with a watercoloring technique using Gelatos!  
Hope you'll stop by and give me a shout-out!

Here's another peek at the finished card!  The Reverse Confetti Count Your Rainbows sentiment was inked up with Faber-Castell Black Stamper's Big Brush.  The tag/flag combination in the upper left corner is a Reverse Confetti Cuts Tag Me, then embellished with a jumbo button and The Twinery's Charcoal Baker's Twine.

Rc faber castell closeup

Thanks so much for stopping by the stage!

 photo supplylist.jpg
Stamps:  Count Your Rainbows (Reverse Confetti)
Ink:  Black Stamper's Big Brush (Faber-Castell)
Paper:  Capture This (Echo Park), White (PTI), Watercolor Paper
Other:  Confetti Cuts Tag Me (Reverse Confetti), Button (PTI), Charcoal Baker's Twine (The Twinery), Doily (Freckled Fawn), Gelatos (Faber-Castell)


 photo stacey_sig.jpg

Sunday, April 27, 2014

Gelatos Birthday ~ Faber-Castell Design Memory Craft


Happy Sunday, folks!  
I'm up on the Faber-Castell Design Memory Craft Blog sharing this "happy birthday" card with a watercolored Gelatos background!

Hope you'll head over and say "hey!"


Thanks so much for stopping by the stage!

 photo supplylist.jpg
Stamps:  Wet Paint (Papertrey Ink)
Ink:  Soft Navy (Simon Says Stamp)
Paper:  Blushing Bride (SU), Watercolor, Favorite Things (Heidi Swapp)
Other:  Gelatos (Faber-Castell), Button, Lemon Drop & Pink Peonies Sequins (Pretty Pink Posh)


 photo stacey_sig.jpg

Friday, March 14, 2014

Verve March Diva Dare & Faber Castell Design Memory Craft


This month's Verve March Diva Dare is "Do The Polka."    

What we're daring you to do this month is to use polka dots somewhere on your card. Whether you choose to strut your polka dot stamps, paper, ribbon or all of the above, we want to see you do the polka!

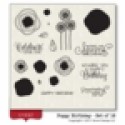
Ever seen aqua poppies?  Probably not, but aren't they GORGEOUS?!  These Verve poppies would look fabulous in ANY color, I believe!


For some extra inspiration, I used Diva Maureen's Viva la Verve March Week 2 Sketch Challenge with Viva la Verve March Week 1 Color Challenge!


I'm also up on the Faber-Castell Design Memory Craft Blog today with a Gelatos and Gesso Background Tutorial!  I'd love for you to stop by over there and give me a shout-out!


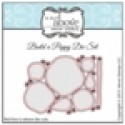
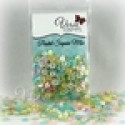
I made some pools of aqua with my Gelatos and water and colored up these fabulous flowers from Poppy Birthday and die cut them with their coordinating dies, Build a Poppy Die Set.  That yummy ribbon is from the Pastel Polka Ribbon Collection and there are a few sprinkles of Pastel Sequin Mix on my card for a little sparkle!


Thanks so much for stopping by the stage!

 photo supplylist.jpg

Stamps:  Poppy Birthday (Verve)
Ink:  Black Marker's Big Brush, Gelatos (Faber-Castell)
Paper:  Sea Glass (Simon Says Stamp), Pretty Things (My Mind's Eye)
Other:  Build a Poppy Die Set (A Cut Above by Verve), Pastel Polka Ribbon Collection, Pastel Sequin Mix (Verve), Gesso (Faber-Castell), Sno Cone Button (MFT), White Hemp Cord (Hemptique), Sewing Machine, Thread


 photo stacey_sig.jpg

Wednesday, February 26, 2014

Top Dog Dies - Stencil Tutorial


It's a great day for some Top Dog Dies FUN!  
 I tried a new technique with this card and thought I'd share a quick and easy tutorial with you!

STENCIL TUTORIAL with TOP DOG DIES

Step 1
After die-cutting the Madison Doily Die and removing all of the intricate cuts, tape down a paper base.

 Step 2
Roll up a small piece of tape and place on the back of your Madison Doily.

Step 3
Place the Madison Doily and the negative paper that you cut the die from over the paper base and tape down, so that nothing shifts around.

Step 4
Spread Faber-Castell Whipped Spackle with a putty knife over the Madison Doily until smooth.

Step 5
Make sure all of the intricate cuts are covered and filled in with spackle.

Step 6
Carefully lift the negative and remove.

Step 7
Carefully remove the Madison Doily and dispose.  Enjoy the beautiful results!


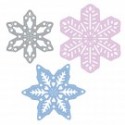
To finish off the card, I die cut a few more Top Dog Dies favorites, stamped a sweet Reverse Confetti sentiment and a few triangles, and embellished with some Pretty Pink Posh goodies.


Thanks so much for stopping by the stage!

 photo supplylist.jpg


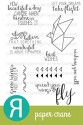
Stamps:  Paper Crane (Reverse Confetti)
Ink:  Picked Raspberry Distress (Ranger)
Paper:  Rustic White (PTI), Vellum (SU), Fresh Cuts (Basic Grey)
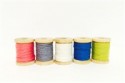
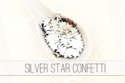
Other:  Madison Doily, Antique Accents, Snowflake Trio, Berry Branch Dies (Top Dog Dies), Coral Twine, Silver Star Confetti, Sparkling Clear Sequins (Pretty Pink Posh), Whipped Spackle (Faber-Castell Design Memory Craft), Sewing Machine, Thread


 photo stacey_sig.jpg

Tuesday, February 25, 2014

Faber-Castell Design Memory Craft - ROCK STAR


It's a great day here at the stage!  Today is my very first Faber-Castell Design Memory Craft post as a Guest Designer!  

You'll have to head on over to the Faber-Castell Design Memory Craft Blog to see my STEP-BY-STEP Tutorial using Gelatos!


There are some fabulous Reverse Confetti and Pretty Pink Posh goodies on my card, too!


Thanks so much for stopping by the stage!

 photo supplylist.jpg

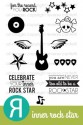
Stamps:  Inner Rock Star (Reverse Confetti)
Ink:  Black Stamper's Big Brush (Faber-Castell)
Paper:  White (PTI), Plus One by Amy Tangerine (American Crafts)

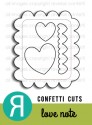
Other:  Love Note (Confetti Cuts by Reverse Confetti), Gelatos (Faber-Castell), Black Twine, Gold Sequins, Silver Stars Confetti (Pretty Pink Posh)

 photo stacey_sig.jpg