
It's a great day for some Top Dog Dies FUN!
I tried a new technique with this card and thought I'd share a quick and easy tutorial with you!
STENCIL TUTORIAL with TOP DOG DIES
Step 1
After die-cutting the Madison Doily Die and removing all of the intricate cuts, tape down a paper base.

Step 2
Roll up a small piece of tape and place on the back of your Madison Doily.

Step 3
Place the Madison Doily and the negative paper that you cut the die from over the paper base and tape down, so that nothing shifts around.

Step 4
Spread Faber-Castell Whipped Spackle with a putty knife over the Madison Doily until smooth.

Step 5
Make sure all of the intricate cuts are covered and filled in with spackle.

Step 6
Carefully lift the negative and remove.

Step 7
Carefully remove the Madison Doily and dispose. Enjoy the beautiful results!

I was inspired by the Unscripted Sketches #245, Dynamic Duos #91, and Simon Monday Challenge: Paste.


To finish off the card, I die cut a few more Top Dog Dies favorites, stamped a sweet Reverse Confetti sentiment and a few triangles, and embellished with some Pretty Pink Posh goodies.

Thanks so much for stopping by the stage!


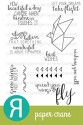

Stamps: Paper Crane (Reverse Confetti)
Ink: Picked Raspberry Distress (Ranger)
Paper: Rustic White (PTI), Vellum (SU), Fresh Cuts (Basic Grey)
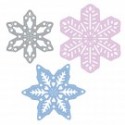
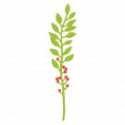
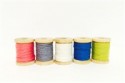
Other: Madison Doily, Antique Accents, Snowflake Trio, Berry Branch Dies (Top Dog Dies), Coral Twine, Silver Star Confetti, Sparkling Clear Sequins (Pretty Pink Posh), Whipped Spackle (Faber-Castell Design Memory Craft), Sewing Machine, Thread
Ink: Picked Raspberry Distress (Ranger)
Paper: Rustic White (PTI), Vellum (SU), Fresh Cuts (Basic Grey)
Other: Madison Doily, Antique Accents, Snowflake Trio, Berry Branch Dies (Top Dog Dies), Coral Twine, Silver Star Confetti, Sparkling Clear Sequins (Pretty Pink Posh), Whipped Spackle (Faber-Castell Design Memory Craft), Sewing Machine, Thread


21 comments:
I am officially going to be getting some of that spackle...this is beautiful, such a great collage feel to your card. The doily stenciling adds just a little extra touch to an already beautiful card.
What a fun tutorial! I love the idea of using the doily shape to create a stencil!
Love the focal cluster and well done with the stencil. Great card as always.
Love the idea of the doily stencil Stacey and those sparkly leafy branches are so pretty!
Love this!!
Oh how cool Stacey--love your tutorial and this technique!
Great masking and pretty card! Thanks for playing at US!
This is gorgeous Stacey!!! So glad you can join us, I always love seeing your beautifully and artfully crafted cards. They are always all so lovely! I know this coming Saturday will be one that gorgeous possibilities for you!!!
Fab tutorial, and love how you have used the sketch! Thank you for joining us at Unscripted Sketches for our latest challenge!
Claire xx
US DT
Love how you used the doily die. Thanks for sharing how to achieve this effect.
Gorgeous Stacey and a great tutorial!
Beautiful technique! Thanks so much for sharing! I've got to get some embossing paste. So glad you joined us this week at Dynamic Duos!
I love this! Great tutorial. Thanks for playing along with US this week :)
Beautiful! Those colors are amazing together. Thank you for joining us this week for the Simon Says Stamp Monday Challenge. ~Michelle
BEAUTIFUL Card!! I LOVE the idea of using my dies like this!! =) THANKS for sharing and have a fabulous Week!! =)
VERY cute, girl. I had never even thought of doing that with a doily die-cut, but I just might steal your idea. It's awesome! I love seeing all your amazing cards - I really do! And I hope you will stop by and share more with us at Word Art Wednesday. We have some really AMAZING sponsors coming this year - it makes me wish that I could play along!
Great work, my friend, and thanks again for the inspiration. You are SO talented.
Hugs,
Karen
www.karen-mycuprunnethover.blogspot.com - my personal blog
www.wordartwednesday.blogspot.com - my challenge blog
Beautiful card - wow! Thank you for sharing the details on the technique, too. It's something I've noticed on cards before but have never tried.
Thanks for sharing your artwork and knowledge with us at Unscripted Sketches!
What a fantastic paste tutorial! I really like how you used such a small amount of it, and yet it still adds such a wow factor. The whole card is absolutely stunning. I adore all the dimension you created with the layers and I like how you arranged the sequins right next to the stars. The dangly string is the perfect finishing touch. Amazing work and I'm so glad you shared this with us here at the Simon Says Stamp Monday Challenge blog!
So pretty Stacey! Love the textured background and the shimmery foliage! Thanks for joining along with the Simon Says Stamp Monday Challenge!
I've never thought to add paste thru my doily die cut. Gotta try that! Such a lovely card, no wonder my fellow DT members chose your card as a winner. Thank You for playing with us at Unscripted Sketches this week! I hope you will join us next week!
WONDERFUL technique! Congrats on TOP 3 at Unscripted Sketches!
Post a Comment